How to install the charging station of the robotic lawnmower?
13.05.2021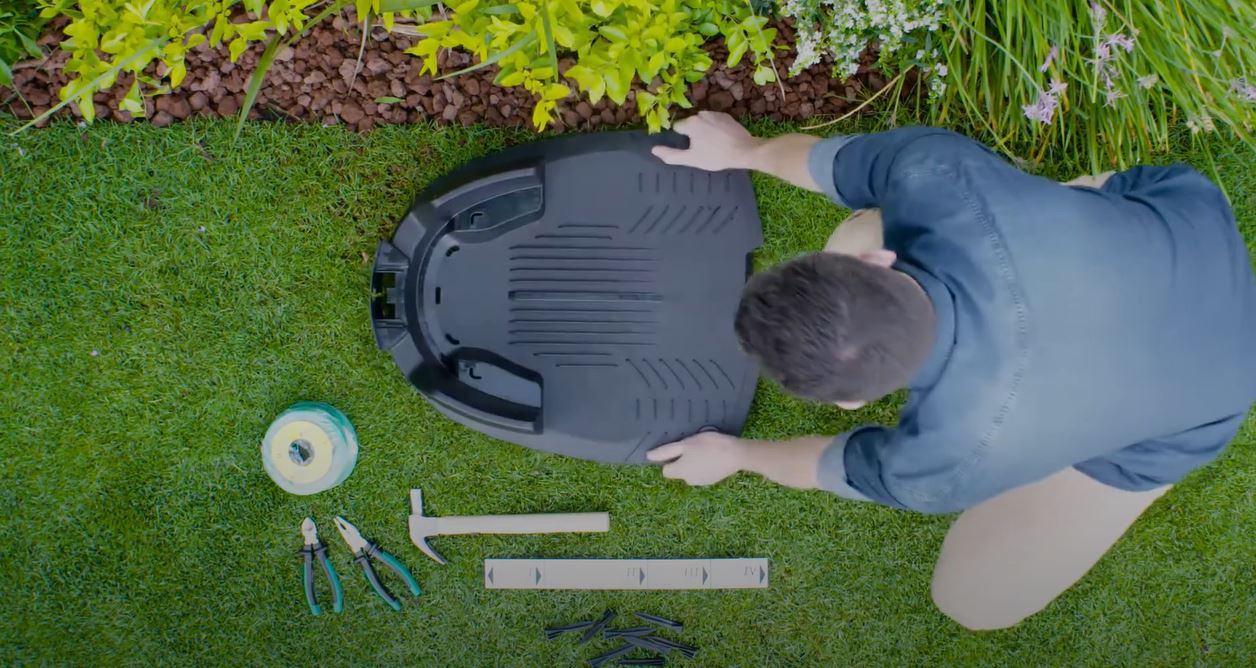
The purchase of a new robotic lawnmower initially involves an investment of time. After all, the garden helper must have a point of contact with the charging station and, through the boundary wire, know which areas are to be mowed and or not. Luckily for you, the installation is not difficult contrary to some skeptics. If you just pay attention to a few things in the process and plan in advance, there will be no problems later during operation.
Step 1: Finding a suitable location
The location for your charging station is important so that the robot can approach it smoothly. A central location that offers about 3 meters of space in front of the station is suitable. This distance allows access from all sides without any problems.
It is also important that the perimeter wire, which leads away from the station and comes back to the other side of it, runs about 3 meters straight ahead. Angled corners are therefore inconspicuous, but rather unsuitable for the charging station. The signal can irritate the robot during the search for the station.
The surface on which the station is located should be as flat as possible and preferably within the lawn area. A nearby power outlet is also important so that the charging station can be operated with a low-voltage cable. It is recommended that the cable be not too long or extended. An outdoor socket should of course be suitable and weather proof for optimal operation.
In addition to full sunlight, it should also be protected against splashing water. A lawn sprinkler near the station should be avoided, since penetrating water could damage the electronics inside. Moreover, permanent heat leads to faster aging of the battery. Incidentally, the same location conditions with regard to sun and water protection also apply to the transformer.
How does the robotic lawnmower find the charging station?
Manufacturers use different systems to guide the robotic lawnmower back to the charging station. A perimeter wire is widely used, which the robot simply travels along when the battery level is low until it reaches the charging station.
Other manufacturers rely on an additional guide wire that runs once across the lawn. This allows the distance to be shortened if the battery power drops in the middle of the area. However, the installation is also more complex, as you have to lay an additional cable to the perimeter wire.
Step 2: Connecting the charging station
Once you have identified a suitable location for the charging station, the connection is simple.
- Connect a low-voltage cable to the charging station.
- Plug the power cable of the transformer into the socket.
- Attach the plate to the ground.
Tip: Wait to attach the plate until you are sure the perimeter wire is properly installed. This will allow you to adjust the position of the charging station slightly if necessary.

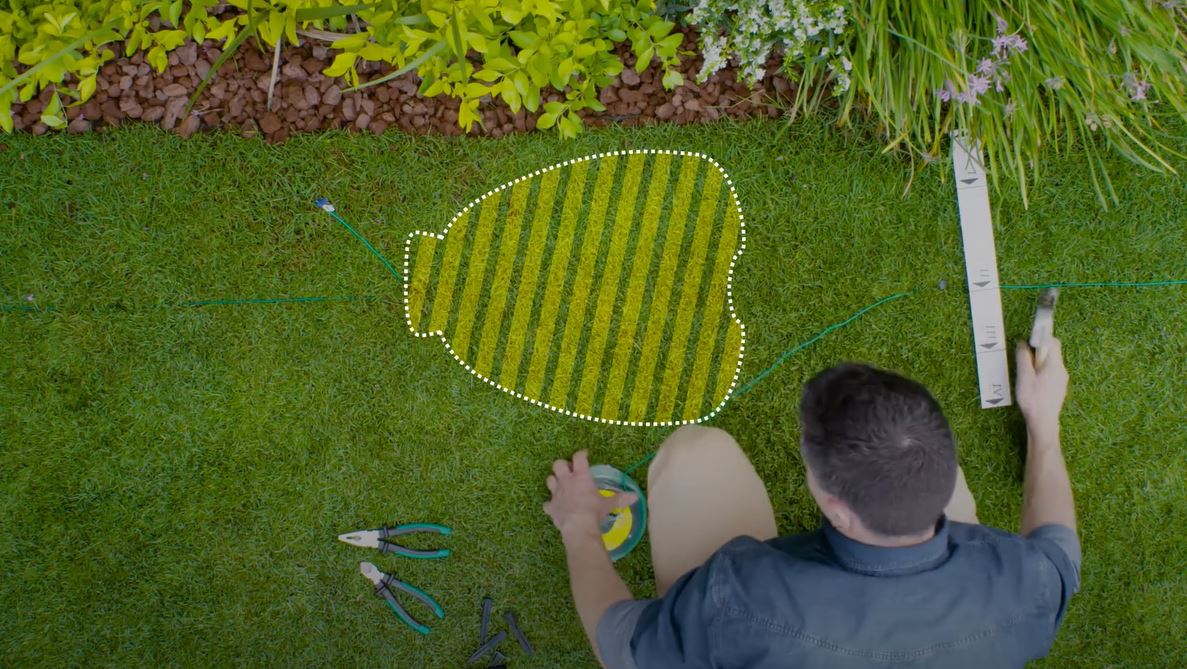
Step 3: Laying the perimeter wire
So that the robotic lawnmower later knows which areas are to be mowed and which are not, it is now necessary to lay the boundary wire. This starts at one side of the station, then runs completely around the lawn until it finally ends up at the other side of the station. This will then establish a closed circuit. Furthermore, a magnetic field is created that the robot detects and will not cross the signal. When laying the cable, it is important to observe a few points such as the correct distance to the edge of the lawn. Moreover, the cable must not cross at any point.
You can lay the cable both above and below ground. While above-ground installation is easier as the cable only needs to be attached to the green with a few lawn hooks, underground installation requires significantly more time. On the other hand, the cable is then protected from weather conditions and is not in danger of being damaged or cut.
Step 4: Start the robotic lawnmower
Once you have completed the preparatory measures, place the robotic lawnmower at the station so that the battery charges for the first time. This also allows for further programming of mowing times, date and time setup and also theft protection. If necessary, you can also define different starting points for main and secondary zones and changes to cutting height.
Installation is particularly easy for models with a touch display or even control via app. This allows the device to be programmed from a cell phone in just a few minutes. If a GSM module is installed in the robot, you don't even need to be near the robot to do this, but can make the settings completely independently of location.

Step 5: Readjustment
The robotic lawnmower should be observed during its first run. If there are problems when driving over certain areas or if the edges are not mowed to the desired length, it is a good idea to make readjustments directly. Once this is done, you will have a lot of fun with your new garden which will reward you with an incredible amount of free time.
Installing a robotic mower is easier than you might think. The only thing that really takes some time at first is laying the boundary wire. The subsequent commissioning, on the other hand, is absolutely child's play thanks to our modern technology.
Products
Buy a Robomow
Robomow owner
About us
Sales & Support