Do I have to lay the boundary wire underground?
28.10.2022
The vast majority of robotic lawnmowers navigate using a boundary wire. This tells the robotic lawnmower via a signal which areas are to be mowed and which are not. Laying the cable is therefore the most important step before the mower’s first start-up. For many first-time owners of a robotic lawnmower, this raises the question of whether it is really worth the effort to lay the cable underground or whether the above-ground variant will suffice.
Laying the perimeter wire is probably one of the most important steps on the way to a functioning robotic lawnmower unless it is a robotic lawnmower with a grass sensor. Here, the wire serves as a signal generator for the device, so that it is clear which areas the robot should traverse, and which are no-go areas. If the robotic lawnmower drives through a flower bed or falls into the garden pond, there will be negative consequences. Accordingly, the first step is to mark the obstacles that the robotic lawnmower cannot detect due to natural barriers. Precise installation of the wire around the edges of the lawn is even more crucial when the mower has edge cutting capabilities for a fine finish.
However, not all laying is the same. There are two different methods: each that come with some advantages and disadvantages. The above-ground version is much easier and faster but is also more prone to damage. With that being said, it is by no means necessary to lay the boundary wire underground. Sometimes it just lends itself, as the extra effort also brings some benefits
How the perimeter wire works
The perimeter wire is fixed to the charging station and laid once completely around the lawn before arriving back at the charging station. The charging station sends out a low but perceptible electrical signal through the wire, which creates a magnetic field and serves as an orientation for the robotic lawnmower to navigate. For this to work properly, two aspects in particular are important:
- The perimeter wire must not be damaged.
- The maximum length of the manufacturer's specification must not be exceeded.
Quick start with easy installation
The start-up of a robotic lawnmower itself is very simple. You simply place the charging station in a suitable place in the garden, connect it to the electric grid, lay the boundary wire around the lawn and use the quick installation of your robotic lawnmower. This helps to define the mowing times, for example.
The first test run can already begin. Laying the boundary wire is probably the most time-consuming of the tasks you will face before the first test run. You have two different options:
- lay the perimeter wire above ground
- lay of the perimeter wire underground
When to lay the perimeter wire above ground
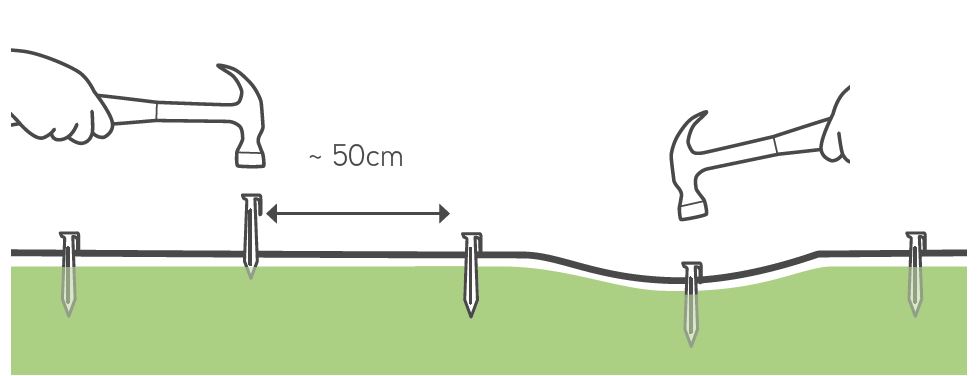
The above-ground installation of the perimeter wire is undoubtedly the simpler option. You simply lay the wire once around the lawn (be sure to include flower beds and other obstacles from the outside) and simply fasten the wire to the distance specified by the manufacturer along the lawn edge with lawn nails. The lawn will grow and cover the wire in about 2-4 weeks, and will then become almost invisible.
Advantages of the above-ground laying of the perimeter wire
First, one clear advantage is that mistakes can be swiftly corrected, and you can quickly make changes to the layout (for example) when redesigning the garden.
If, after the first laying, you find that the lawn edges need readjustment because the distances may not be correct or the effort required for retouching is too great, the perimeter wire can easily be moved.
Disadvantages of laying above ground
Nonetheless, when the perimeter wire is laid above ground, it is also permanently exposed to external influences such as rain, ice, and snow. The risk of corrosion and weathering is incomparably higher than with underground laying. Over time, the wire can become permeable and may break. In this case, the only solution is repair, which is comparatively easy to underground installation.
At the same time, a properly tautly laid cable also carries the risk of being damaged during gardening work such as scarifying or when digging up flower beds. The blades of the scarifier or a careless spade can easily cut the cable, so caution is always critical. Other burdens, such as those caused by traction wheels or the blades of a lawn robot, on the other hand, generally do not pose a problem for the perimeter wire when the cable is laid properly.
Underground installation of perimeter wire
It is probably indisputable that a wire that is buried underground is less affected by the elements. This raises the question whether it makes sense to lay the cable underground as a matter of principle. Most manufacturers and 3rd part providers offer professional underground installation services.
Advantages of underground laying
In addition to the lower risk of damage from wind and weather, one advantage is that the wire is invisible underground, significantly reducing the risk of damage from a scarifier or other garden tools. This means you can carry out gardening work worrying less about the perimeter wire .
Another advantage is, of course, the inconspicuous appearance. The cable is invisible even under paved passages, as you can simply run it under the stones. Most cables can transmit their signal with minimal problems up to a depth of about 7 centimeters.
Disadvantages of underground laying
The disadvantages of underground installation are obvious. Once the wire is laid, a change in your garden design turns out to be comparatively complicated, as the cable has to be dug up each time. In the event of an accident, this also makes troubleshooting more difficult if the cable has to be uncovered again. Wire breaks are not easy to detect visually, so a tool is always needed to locate the signal interference.
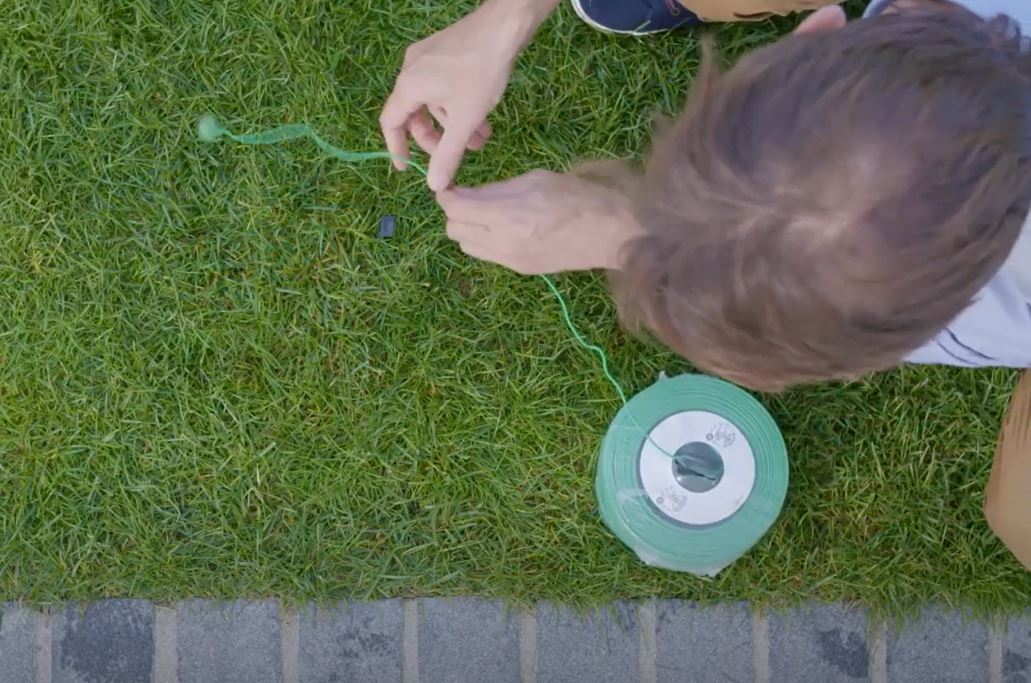
And, of course, the laying itself is also more complex. An initial channel, approximately 4 cm deep, must be dug for the wire. This usually works quite well with a lawn edger. However, unconventional methods such as discarded angle grinders or chainsaws are also suitable for making the channel. Those who do not want to make the effort themselves, but do not want to give up the convenience of underground laying, can hire a specialized company for this purpose. They have the correct equipment for digging. In any case, the channel should be laid to a uniform depth. Otherwise, the edge drive will be somewhat less accurate than when laying above ground.
Laying boundary wire - what to keep in mind
For both underground and above ground laying, the wire should be tautly stretched. It must not cross at any point, otherwise signal interference may occur and cause the robotic lawnmower to become disoriented. This is especially important if you include flower beds and the like in the center of the lawn in the induction loop, where the wire is routed from the outer edge to the center of the lawn and back.
Finally, it is important to keep the distances of the lawn edge and walls according to the manufacturer's instructions. This will help minimize lawn-edge retouching and prevent damage to the robotic lawnmower.
Laying boundary wire underground for a rolled turf
It seems tempting to simply place the wire under the turf when laying the sod. However, this carries a r risk, as you won't be able to test the functionality of the wire until the turf is in place. This means that troubleshooting can turn out to be costly.
We recommend placing the wire above ground first and starting the robotic lawnmower. This way, any problems can be detected in the first few days. It is important to know that after laying the sod, you have a 3-week window to place the perimeter wire underneath. After that, the rooting can become too strong.
As an alternative to simply sliding the wire under the sod, it’s perfectly okay to dig a channel in the grass where you can place the wire. This way you are completely independent when you dig the channel or when you purchase your robotic lawnmower.
Note, if you prefer the above-ground option, it is just as feasible with sod as with any other lawn.
Advantages and disadvantages for installation methods
Both above-ground and underground laying of the perimeter wire has advantages and disadvantages.
| Advantages | Disadvantages | |
| above-ground laying |
|
|
| underground laying |
|
|
When is underground laying recommended
There is no answer to this question. It is simply impossible to give a blanket answer as to whether above ground or underground laying is better. It is certainly an ideal solution for gardeners who prefer an unobtrusive overall appearance, knowing that the garden design is completed for the coming years. To make sure that the robotic lawnmower works properly, it is also a good idea to install it above ground first. Although this involves twice the effort, it can help reduce the potential for errors afterwards. Anyone who is afraid of the hassle of laying the grass themselves can call in a professional service to do the work.
Lawn owners who regularly scarify their lawns are also better off laying the wire underground. After all, this helps minimize worry about accidentally cutting it with gardening equipment.
Conversely, above ground installation is recommended for people who like to remain flexible and prefer both easy installation and quick troubleshooting. Moreover, any repairs can be done quickly, and the visual impact on an overall, harmonious appearance disappears after a few weeks.
Products
Buy a Robomow
Robomow owner
About us
Sales & Support