Laying the lawn boundary wire - how the robotic lawnmower works
05.05.2023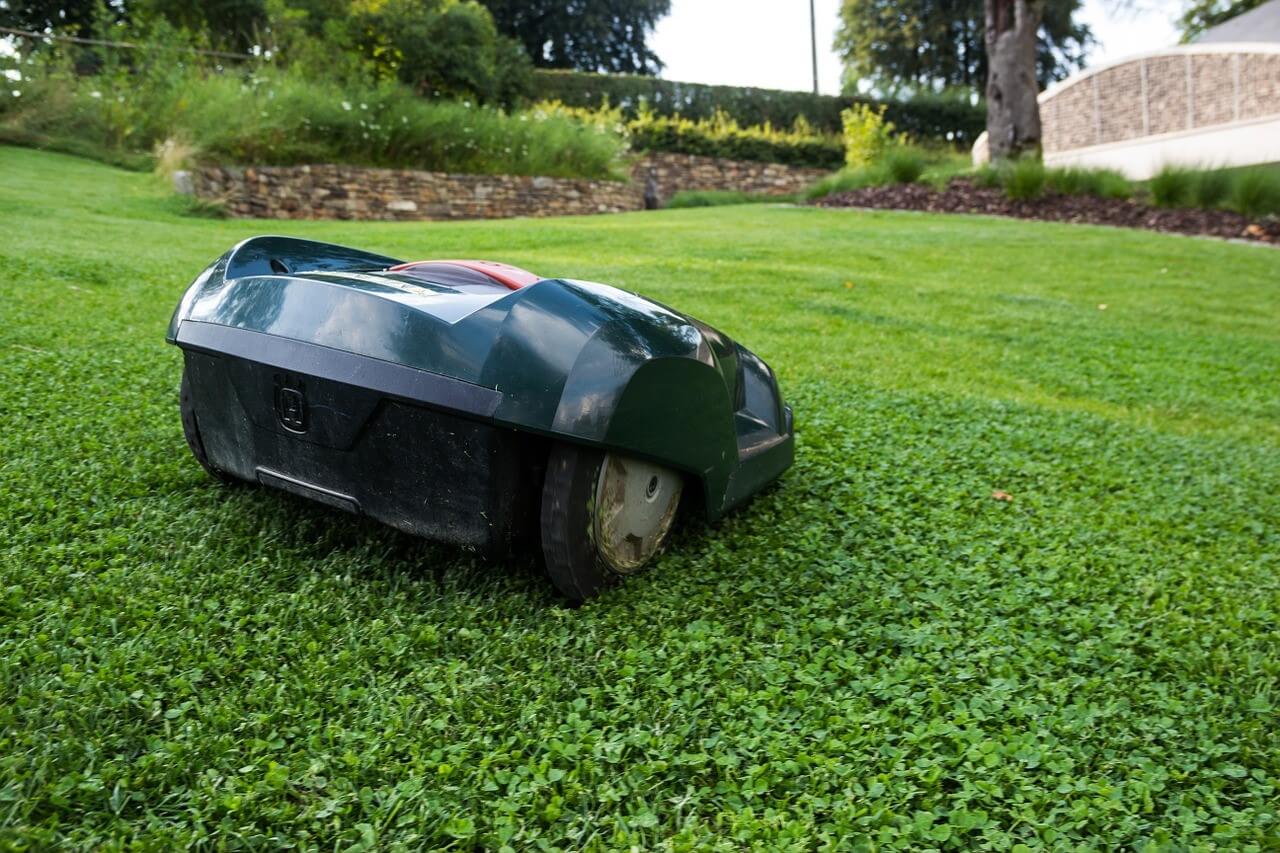
After purchasing a robotic lawnmower, the first step (before the first start-up) is a one-time installation. After all, the robot needs to know which areas it should mow, where the property boundary is and which flower beds are not part of the lawn. Only with the help of this orientation can the device later find its way back to the charging station, which independently provides a supply of power.
HOW A BOUNDARY WIRE WORKS
The boundary wire is connected to the charging station, thereby it energizes the wire. This generates a very low magnetic field sufficient to send a signal to the robot. It can even handle a cable buried up to about 7 cm deep under the ground. The signal also acts like a stop sign and helps prevent the robot from driving over the cable, mowing unwanted areas or accidentally landing in a garden pond.
Due to the magnetic field, the cable must not be crossed under any circumstances, as this would cause interference and prevent the device from operating smoothly.
WHEN IS A BOUNDARY WIRE NECESSARY?
Basically, for any robotic lawnmower that does not work with grass sensors, it is necessary to lay the boundary wire once. The minimum is to outline the outer edge of the area to be mowed. Within this area each bed, garden pond or even gravel area must be separated with the cable unless there is a natural barrier (e.g. a wall) that the robotic lawnmower cannot traverse.
Paved paths whose upper edge coincides with the ground surface of the lawn, on the other hand, generally do not pose a problem. The robotic lawnmower can simply drive over them.
PREPARATION AND PLANNING FOR LAYING THE BOUNDARY WIRE
Before laying the wire, it is always a good idea to make a sketch. This will quickly reveal any special obstacles such as slopes, narrow passages or potential cable crossings that need to be planned for or prevented. It is important to note the outer borderline and to take into account that the cable must be laid in one piece, i.e. obstacles should be outlined in a single stretch. This can be quite a challenge especially when it comes to incorporating islands and flower beds from the outer edge to the center of lawn.
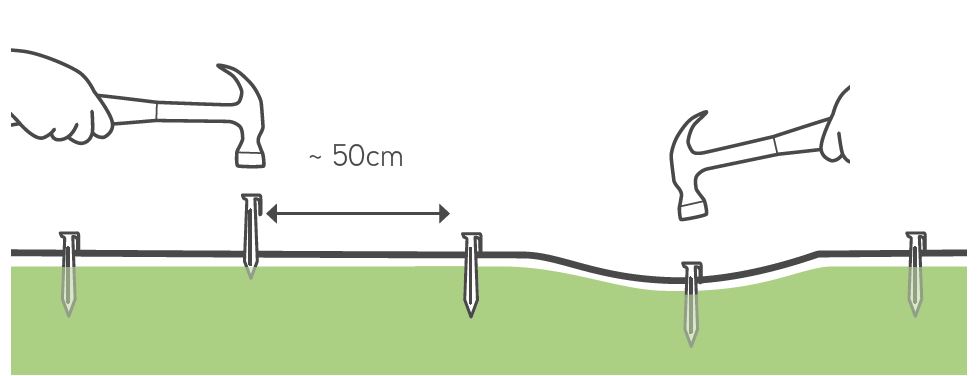
With some robots, it is also possible to define remote start points in different mowing zones so that the robot regularly approaches these areas. This is particularly significant if the passage to this zone is quite narrow and is not automatically controlled by the robot. In principle, it should be wider than 70 cm. Otherwise, signal interference of the two boundary wires may occur.
Another question that arises during planning is, of course, the required amount of cable. Ready rolls of 100 m, 200 m and even up to about 650 m are available. In the event that this is not enough, two cable ends can simply be clamped together by means of connectors. However, manufacturers specify a maximum total length that should not be exceeded, as smooth transmission is no longer guaranteed if the cable is too long.
If there are other robotic mowers in the neighborhood, there is a risk that the signals could cross. If that happens, it may be necessary to modify the frequency of the transmitter and receiver to ensure smooth operation of your own device.
Laying the boundary wire is easier when the lawn is as short as possible. Therefore, mow it thoroughly beforehand and also trim the edges carefully. This will also help make it easy to measure the correct distance to the lawn edge.
LAYING THE BOUNDARY WIRE
Care must be taken when laying the boundary wire. After all, it serves as a basis for the robot to make its rounds reliably and help avoid damage or harm to itself. This work is not particularly complicated if you keep a few important points in mind.
Limiting obstacles
Obstacles in the middle of an area must also be demarcated with the boundary wire. To do this, run the wire from the lawn edge across the area/lawn to the obstacle (e.g. a bed, pond or sitting corners) and completely encircle it once. Then run the wire back to the edge parallel to the outward lead. This parallel guidance helps cancel out the signals and allow the robot to simply bypass this distance in contrast to the wire, which is now laid around the obstacle. It is critical that the wire does not cross at any point to help avoid signal interference.
Incidentally, it is by no means necessary to define every flowerpot as an obstacle. After all, the robot is also equipped with sensors designed to detect obstacles independently and avoid them automatically. It will initiate a turning maneuver in the event of a collision. So, if your flowerbeds have a border several centimeters high, there is no need to lay an additional perimeter wire.
Maintain spacing
Manufacturers define specific distances that must be maintained from walls, stones and beds in order to help avoid damaging the blades. Often, a ruler is included for easy measurement. Naturally, small strips involve manual retouching with lawn shears or a lawn trimmer, which can, at most, be reduced with a robotic lawnmower equipped with an edging function. In the best case scenario, this can be avoided if the lawn boundary is passable for the robotic lawnmower. Otherwise, the following guide values apply (always refer to the installation instructions of your specific robot model to determine the required distances):
- Distance to walls and tall stones approx. 35 cm
- Distance to beds or hedges approx. 10 cm
- Distance to slabs and paths also approx. 10 cm, provided that the surface is at ground level or lower than the lawn surface
- Distance to a pond approx. 35 cm, with additional obstacles to prevent the robot from falling in.
- Special rules apply to narrow passages so that the robot can find its way both into and out of secondary areas.
- On inclines, the cable should always be laid diagonally.
- In corners, be sure to lay the cable in a curve to avoid having your robot make complicated maneuvers.
The optimum laying depth
A laying depth of 4-5 cm is optimal to protect the perimeter wire from bad weather and to help prevent it from being damaged by a scarifier or other garden equipment. It is important to maintain a uniform depth to help achieve a nice, clean edge cut.
In principle, the robotic lawnmower receives the signal from the boundary wire at a laying depth of up to 7 cm. This allows you to bury the wire under stones or patio slabs and to mark passages even under paths.
Extend boundary wire
If the boundary wire is not sufficient, it is possible to extend it with connectors. It is best to use the original parts from the manufacturer, as they are generally weather resistant and help protect the ends of the cable from corrosion. Make sure that both cable ends are fully inserted into the connector (i.e. visible on the other side). Finally, press the button on the top of the connector to securely attach the cables together.
LAYING THE WIRE ABOVE GROUND OR UNDERGROUND
When laying the boundary wire, you have the option between above-ground and underground laying. Both options have their advantages and disadvantages.
Laying the boundary wire above ground
Laying above ground is, of course, easier and requires less work since the cable only needs to be fastened at regular intervals with lawn hooks. Grass grows quickly around the wire and hooks, which helps avoid a threat to the robotic lawnmower.
Nonetheless, an above-ground wire can lead to problems if you scarify your lawn or use a lawn trimmer around the edges. Both can cut the wire relatively easily.
There is also a higher risk of wear and tear on the surface, as the cable is exposed to wind and other conditions. One advantage is that defects can be easily and quickly be detected and repaired with cable connectors.
Another advantage is flexibility in terms of garden design. If you plan to replant beds or include new obstacles, the perimeter wire can be adapted to the new conditions relatively easily.
In any case, it is important to pull the wire nice and tight, so that it does not stick out anywhere and become damaged.
Laying the perimeter wire underground
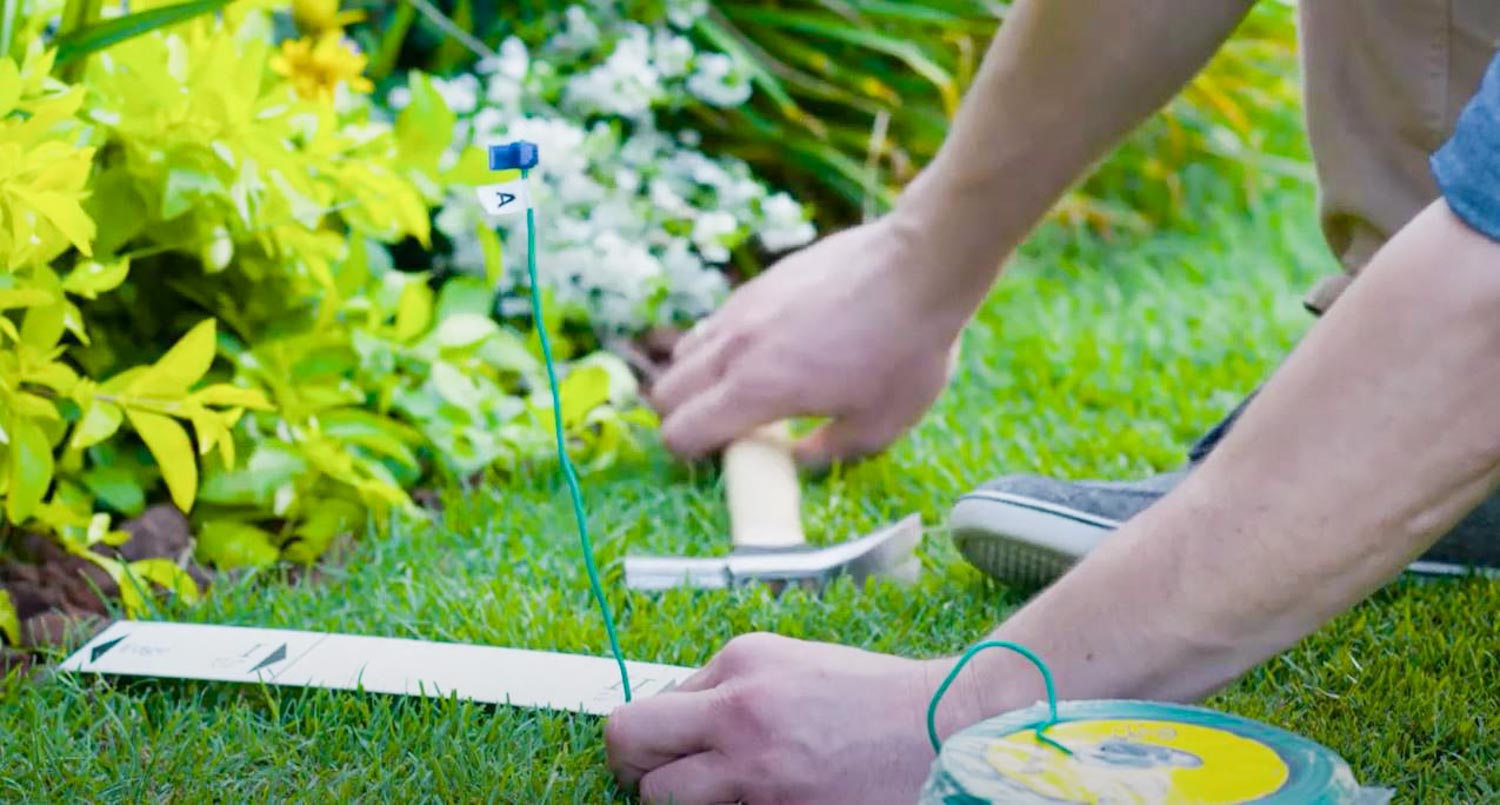
Underground laying is a bit more complex. In any case, it is usually enough to use a small spade to make a furrow along the lawn into which the wire is then placed. Another tool that can be used is a discarded angle grinder or chainsaw. It is best to draw a tight, straight string for the creation of your furrow.
Keep in mind that an above-ground test run is definitely a good first step. Leave the cable above ground for 2-3 weeks on test mode and only bury it when the robotic lawnmower works as desired. If there is a need for readjustments, they can be easily made.
An advantage of laying the wire underground is protection from the weather, which can significantly increase the durability of the cable. The same applies to accidental damage to the wire by a scarifier, other garden equipment or human fault. However, if damage is done (e.g. animals have gnawed on the wire), troubleshooting and repair will be much more difficult than with a wire laid above ground.
Moreover, the wire will be invisible from the start and aesthetically pleasing.
Installing lawn boundary wire with a laying machine
Alternatively, the use of a special cable laying machine is also possible, which further helps to simplify the work. The boundary wire is laid evenly 4-5 cm deep into the ground. The device has a spacer to keep the edge of the lawn and draws a slot into which the cable is placed directly.
Overhead vs. underground boundary wire
As you can see both installation options have their advantages and disadvantages. Therefore, it is impossible to make a blanket statement as to which option is more suitable for your garden; it is ultimately a matter of personal preference.
Above-ground laying
Advantages
- less effort
- easy to correct when redesigning the lawn
- repairs are less complicated
Disadvantages
- damage by scarifier, trimmers and human error is possible
- grass must grow in around wire and hooks
- wear and tear due to weather influences
Underground laying
Advantages
- greater protection from scarifiers, trimmers and human error
- directly invisible
- less influence from weather
Disadvantages
- time-consuming installation
- inflexible when redesigning the garden
- repairs are more complicated
Laying lawn boundary wire under sod
It seems tempting to lay a boundary wire directly under the turf. However, this can lead to a lot of extra work later on, as it is difficult to make corrections afterwards if, for example, the distances to the lawn edge are not correct. Moreover, we recommend a test phase of 2-3 weeks above ground. Then, when it is clear that the robotic lawnmower is working smoothly, it is still possible to place the boundary wire under the sod, as it needs about 2-3 weeks to grow on the subsoil.
Conclusion
Laying the boundary wire definitely involves some effort, but it is worth it. It is important to lay the cable carefully (i.e. take your time so that the operation of the robotic afterwards also works smoothly afterwards). Alternatively, those who would like to shy away from the extra effort here can hire a professional. A professional installation service usually takes care of the installation of the device at the same time, so that the robotic mower can start
Products
Buy a Robomow
Robomow owner
About us
Sales & Support